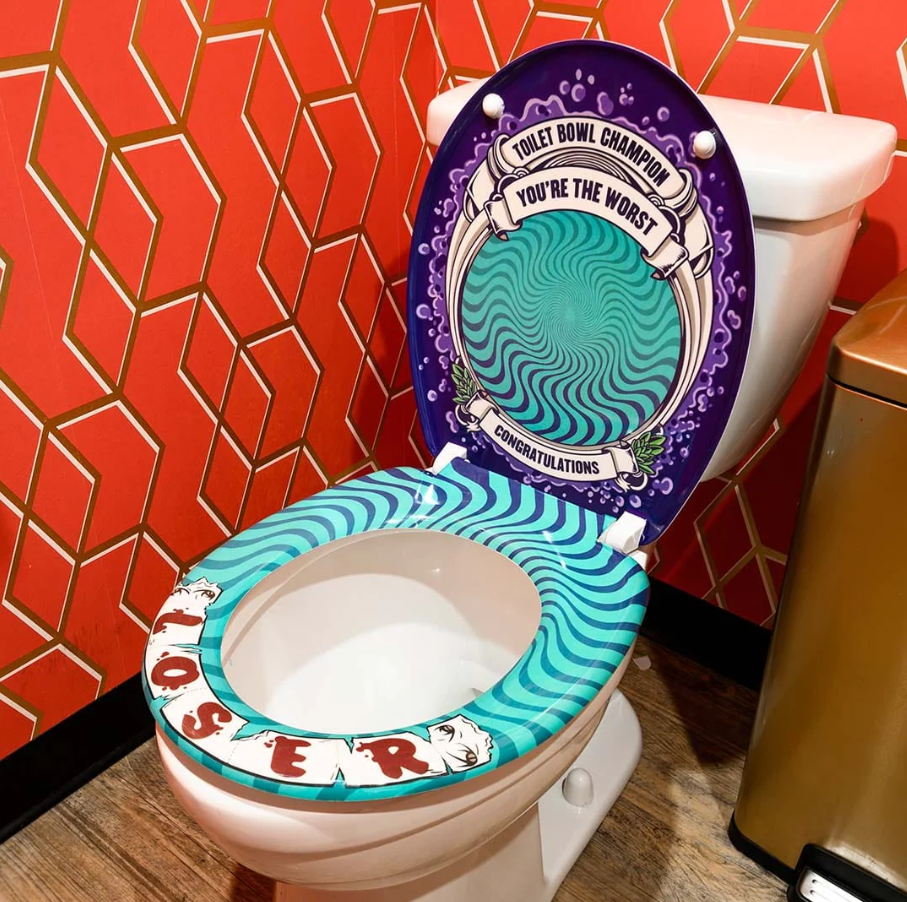
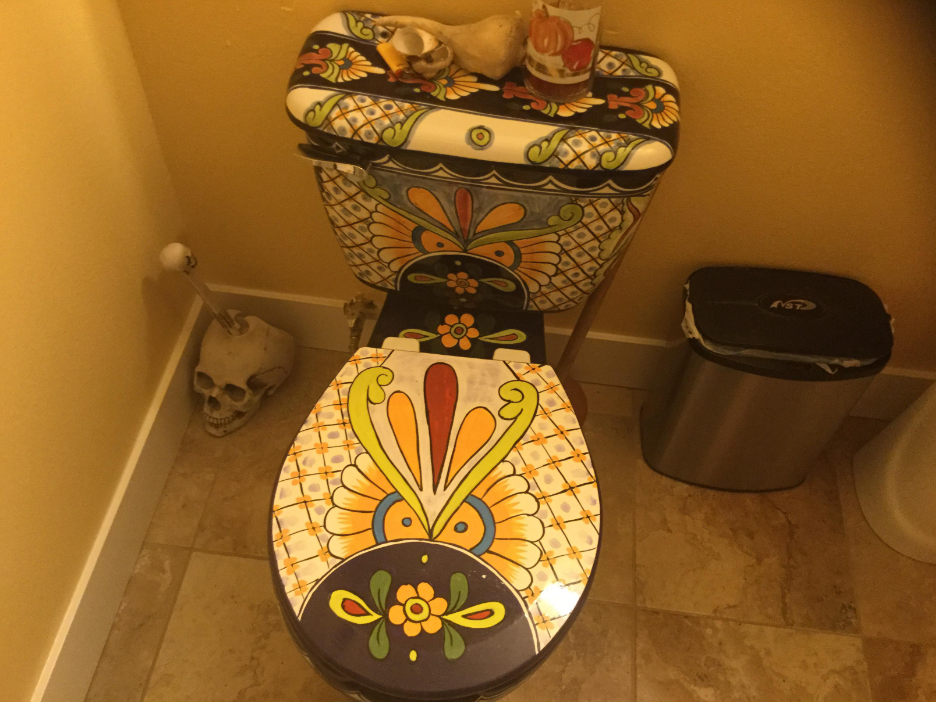
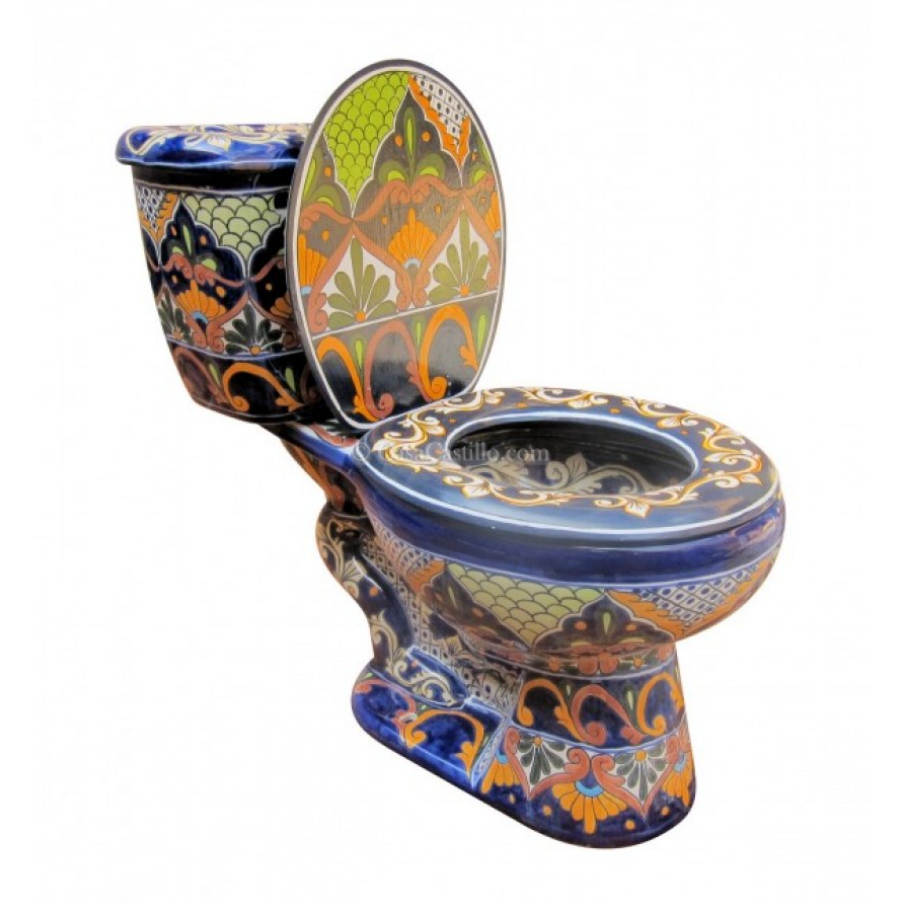
The toilet seat is an essential part of our daily lives yet often overlooked when it comes to home décor. But why should it be? After all, it’s a canvas just waiting to be transformed into something fabulous! And you might be wondering, ” Can toilet seats be painted?”
Yes, toilet seats can be painted, but it’s essential to follow specific steps for proper adhesion and durability.
Start by thoroughly cleaning the seat to remove any dirt or residue, and then sand it lightly to create a rough surface for the paint to adhere to. Next, apply a primer designed for plastic or wood surfaces, depending on the material of your toilet seat.
After the primer has dried, use a paint specifically formulated for bathroom fixtures, as it will be more resistant to moisture and wear.
Multiple thin coats are generally better than one thick coat to achieve a smooth finish.
Allow each coat to dry completely before applying the next. Once the paint has dried and cured according to the manufacturer’s instructions, consider applying a clear sealant for added protection.
Keep in mind that painted surfaces may require periodic touch-ups over time due to regular use and cleaning.
Which Toilet Seat Materials Can Be Painted?
Before we pick up our brushes and paints, let’s take a moment to appreciate the diverse range of toilet seat materials that can be painted.
We have the classic wooden ones that exude rustic charm, the no-nonsense plastic seats that are easy to clean, and even more unique materials like resin or padded seats.
Each material comes with its own set of advantages and disadvantages, which we must consider before embarking on our painting journey.
Wooden Toilet Seats:
- Advantages: Timeless appeal, elegant finish, and durable if properly cared for.
- Disadvantages: Susceptible to water damage if not sealed properly, may require more maintenance.
Plastic Toilet Seats:
- Advantages: Easy to clean, budget-friendly, and resistant to water damage.
- Disadvantages: Less aesthetically pleasing compared to wooden seats.
Resin Toilet Seats:
- Advantages: Can mimic the appearance of other materials, durable, and easy to clean.
- Disadvantages: May not have the same authentic feel as natural materials.
Considering these differences will help us choose the right painting techniques and materials for our project, ensuring that the final result is both visually appealing and functional.
Also read: 10 Best Bathroom Towel Racks to Buy in 2024
Preparing the Toilet Seat for Painting
Now that we’ve chosen our canvas – whether it’s wood, plastic, or something else – it’s time to prepare it for the artistic transformation.
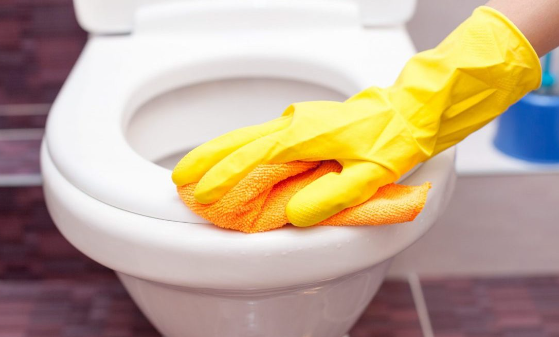
Painting a toilet seat requires a clean, smooth surface to ensure the paint adheres properly and lasts for a long time. The last thing we want is our artwork peeling off after a few weeks!
Step-by-Step Cleaning and Sanitization
- Remove the toilet seat from the hinges (follow the manufacturer’s instructions).
- Clean the seat thoroughly using warm soapy water and a soft cloth to remove any grime, stains, or residue.
- Sanitize the seat with a mild disinfectant to ensure a hygienic painting surface.
Necessary Tools and Materials for Preparation
- Soft cloth or sponge
- Mild soap or detergent
- Mild disinfectant
- Sandpaper (medium grit)
- Painter’s tape or masking tape
Also read: Are Bathroom Rugs Out of Style?
Sanding and Priming Techniques for Different Toilet Seat Materials:
- For wooden seats: Lightly sand the surface to create a smooth base for paint adhesion. Use a wood primer to seal the surface and prevent moisture damage.
- For plastic and resin seats: Sand the surface lightly to roughen it, allowing the paint to adhere better. Use a plastic primer or an adhesion promoter for better results.
By following these preparation steps, we ensure that our toilet seat is squeaky clean and ready for its artistic makeover!
Also read: No More Struggle: A Guide to Effortless Toilet Bolt Caps Removal
Selecting the Right Paint for Toilet Seats
Paint comes in various types, colors, and finishes, and choosing the right one for our toilet seat project is crucial.
We don’t want to use any old paint lying around; we need something durable and suitable for bathroom use.
In this section, we’ll explore options like acrylic, enamel, and latex paints, weighing their pros and cons to make an informed decision.
Also read: How Can You Renovate a Bathroom Cheaply?
Choosing Paint Types Suitable for Toilet Seats
Acrylic Paint
Water-based, quick-drying, and easy to clean. Suitable for wooden and plastic seats but may require a clear protective topcoat for added durability.
Enamel Paint
Oil-based, long-lasting, and highly durable. Ideal for wooden seats but may not adhere well to plastic seats without proper preparation.
Latex Paint
Water-based like acrylic but may not be as durable. Best suited for wooden seats.
Also read: Remodeling Your Bathroom: Navigating the Permits Conundrum
Factors to Consider When Selecting the Right Color and Finish
Color Psychology
Consider the overall bathroom decor and choose a color that complements the space. Soft, calming colors are ideal for creating a spa-like ambiance, while bold colors can add a pop of excitement.
Finishing
Opt for a semi-gloss or high-gloss finish for better water resistance and ease of cleaning.
Eco-friendly and Non-Toxic Paint Options for Bathroom Use
Look for low-VOC (volatile organic compounds) or no-VOC paints to minimize harmful fumes in the bathroom environment.
Water-based paints are generally more eco-friendly than oil-based ones.
By carefully selecting the right paint, we ensure that our toilet seat project not only looks stunning but also stands the test of time in the humid bathroom environment.
Also read: How to Install a Bathroom Sink Drain
Painting Techniques for Toilet Seats
Ah, the moment we’ve all been waiting for – the actual painting process! There are two main techniques to consider: brush painting and spray painting. Each method has its merits and downsides, and we’ll weigh them to determine which one suits our individual preferences and skills.
Brush Painting vs. Spray Painting – Pros and Cons:
Brush Painting
- Pros: Allows more control, better for detailed designs and intricate patterns, minimal overspray.
- Cons: May leave brush marks, requires more time and effort, can result in uneven finish if not applied correctly.
Spray Painting:
- Pros: Provides a smooth, even finish, quicker application, great for large surfaces, minimal brush marks.
- Cons: Requires proper ventilation and safety precautions, may have overspray, not ideal for intricate designs.
Also read: 10 Best Double Sink Bathroom Vanities to Buy in 2024
Step-by-Step Guide for Brush Painting and Spray Painting Methods
Brush Painting
- Start with a small brush and paint the edges and corners of the seat.
- Use a larger brush to paint the larger surfaces.
- Apply thin, even coats, and allow each coat to dry before applying the next.
- Use light, smooth strokes to minimize brush marks.
Spray Painting
- Follow the manufacturer’s instructions on how to use the spray paint properly.
- Apply several thin coats rather than one thick coat to achieve a smooth finish.
- Hold the spray can at a consistent distance from the surface to avoid uneven coverage.
- Allow each coat to dry before applying the next.
Tips to Achieve a Smooth and Even Finish
- Work in a well-ventilated area to prevent inhaling fumes and overspray.
- Keep the paint can or brush clean to avoid contaminating the paint and surface.
- Practice on a small, inconspicuous area before painting the entire seat.
By mastering these painting techniques, we’ll turn our toilet seats into stunning works of art that add a personal touch to our bathroom spaces.
Also read: Why Does My Bathroom Smell Like Sewage
Drying and Curing Process
Now, before we get too carried away with our newly painted masterpiece, it’s time to understand the importance of patience. Drying and curing are crucial steps in the painting process, and rushing through them can lead to disastrous consequences.
Importance of Allowing Sufficient Drying Time Between Coats
Rushing to apply the next coat before the previous one is fully dry can cause the paint to lift or create a tacky surface.
Understanding the Curing Process and Avoiding Premature Use
- Curing refers to the process in which the paint reaches its maximum hardness and durability.
- Avoid using the toilet seat until the paint has fully cured, which may take a few days to a couple of weeks, depending on the type of paint used.
How to Maintain the Painted Toilet Seat for Long-Lasting Results

- Clean the seat with a soft, damp cloth and mild soap to avoid damaging the painted surface.
- Avoid using abrasive cleaning tools or harsh chemicals that could scratch or dissolve the paint.
- Apply a clear protective topcoat for added durability and protection.
By exercising patience and following proper drying and curing procedures, we ensure that our painted toilet seat remains a masterpiece for years to come.
Also read: Can You Use Waterproof Bathroom Paint Instead Of Tiles?
Troubleshooting Common Painting Issues
Alas, even the most seasoned artists encounter hiccups along the way. Don’t fret! I’ve got your back with a comprehensive troubleshooting guide.
Whether you face issues like chipping, peeling, or uneven coverage, I’ll provide you with the know-how to fix them without causing any damage to your hard work.
Also read: How Much Does It Cost to Install a Saniflo Bathroom?
Addressing Problems like Chipping, Peeling, or Uneven Coverage
- Chipping and peeling may result from inadequate preparation or using the wrong type of paint for the material.
- Touch up the affected areas with a small brush and matching paint to fix minor issues.
- For uneven coverage, sand the surface lightly and apply additional coats of paint.
How to Fix Mistakes without Damaging the Toilet Seat
For small mistakes, use a fine-grit sandpaper to gently remove the unwanted paint.
If the mistake is more substantial, consider repainting the entire seat after proper preparation.
Preventive Measures to Maintain the Painted Surface
- Avoid placing heavy objects on the seat that may scratch or dent the paint.
- Educate household members about the painted seat to ensure they handle it with care.
- Clean the seat regularly with a soft cloth and mild soap to prevent dirt buildup.
By addressing common painting issues promptly and implementing preventive measures, we ensure that our toilet seat artistry remains flawless.
Safety Considerations
Safety first, my friends! Painting in the bathroom environment requires a bit of extra caution, considering the chemicals involved and the enclosed space. In this section, I’ll lay out the necessary precautions, ventilation requirements, and safety gear you’ll need to ensure a safe and enjoyable painting experience.
Also read: Why Is My Toilet Water Blue?
Precautions for Handling Paints and Chemicals in the Bathroom Environment
- Work in a well-ventilated area to minimize fume inhalation.
- Keep the bathroom well-ventilated even after completing the painting to disperse any lingering fumes.
Ventilation and Safety Gear Requirements during the Painting Process
- Open windows and use fans to improve airflow.
- Wear a respirator or dust mask to protect against fumes and particles.
- Use gloves to prevent skin contact with paint and chemicals.
Keeping Children and Pets Safe during and after the Painting Project:
- Restrict access to the bathroom while painting and during the drying and curing process.
- Keep paint and painting materials out of reach of children and pets.
By prioritizing safety, we ensure that our bathroom artistry is not only visually pleasing but also a healthy and enjoyable experience.
Also read: Pros and Cons of Skirted Toilets
Alternatives to Painting Toilet Seats
Not everyone might be ready to take the plunge into the world of bathroom artistry, and that’s okay! In this section, we’ll explore other creative ways to update or decorate toilet seats without picking up a paintbrush.
Decals and Stickers
Decorative decals or stickers can be easily applied to the toilet seat, adding personality without the need for paint.
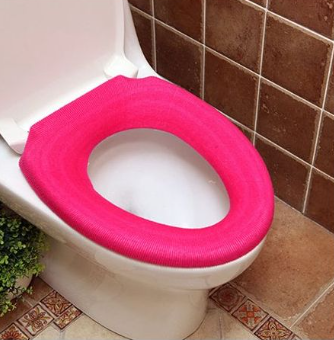
Seat Covers
Seat covers come in various designs, colors, and materials, offering a quick and reversible way to update the look of your toilet seat.
DIY Embellishments
Get creative with ribbons, fabric, or other craft materials to add decorative touches to the seat.
Understanding When It Might Be Better to Replace the Toilet Seat Altogether
If your current toilet seat is damaged or too worn, it might be more practical to invest in a new one rather than attempting to paint or decorate it.
By exploring these alternatives, you can still add a personal touch to your bathroom without the commitment of painting.
Also read: How to Protect the Floor Around Your Toilet
Conclusion
Congratulations, my fellow bathroom artists! We’ve made it through the exciting and enlightening journey of painting a toilet seat.
From understanding the materials and selecting the right paint to mastering painting techniques and safety considerations, we’ve covered all the essential aspects of this unique project.
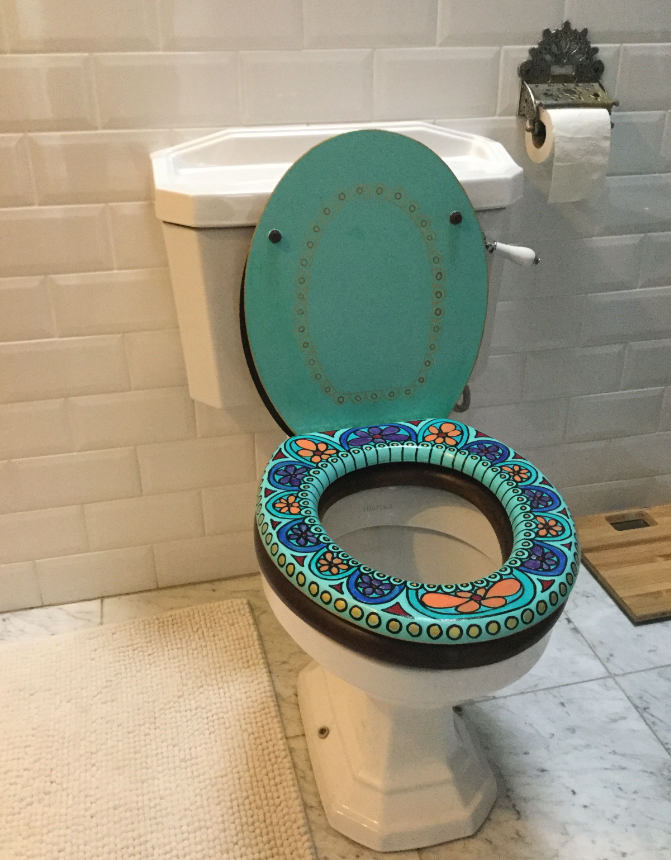
Remember, painting a toilet seat isn’t just about aesthetics; it’s about self-expression and adding a personal touch to the little things in life.
By following proper guidelines, being patient, and having fun with the process, you’ll end up with a toilet seat that’s not just functional but also a true work of art.
So, go forth and let your creativity flow!
Turn your toilet seats into stunning masterpieces that reflect your unique style and taste. And don’t forget to share your experiences and ask any questions in the comments section below. Happy painting!
Also read: Dealing with a Toilet Brush Head Stuck in the Toilet
What steps should I follow to prepare the toilet seat for painting?
The preparation involves removing the seat, cleaning with soapy water, sanitizing with disinfectant, and sanding the surface. Different materials require specific priming techniques, such as wood primer for wooden seats and plastic primer for plastic seats.
Can I really paint my toilet seat?
Yes, you can paint your toilet seat. Following specific steps, including cleaning, sanding, priming, and using the right paint, ensures proper adhesion and durability.
Which materials of toilet seats can be painted?
Wooden, plastic, and even unique materials like resin or padded seats can be painted. Each material has its own advantages and disadvantages, influencing the painting techniques and materials used.