A leaky, dripping, or worn-out faucet is an eyesore in any bathroom. Replacing an old, inefficient faucet with a new water-saving model can refresh the look of your sink area and save on water bills over time.
While swapping out a faucet may seem intimidating, it’s actually a straightforward DIY project for most homeowners. Following key preparation and installation steps, you can upgrade your bathroom faucet to a more functional and attractive fixture.
This article outlines the complete process on how you can safely change a bathroom sink faucet and install a shiny new, water-efficient replacement.
Things To Know Before Changing a Faucet
Check Water Supply Lines
Inspect the flexible supply lines that run from your home’s water pipes up to the faucet inlets to ensure they are in good shape. Brittle or cracked tubes will need replacement.
Also, confirm compression fittings are tight. Loose fittings can lead to leaks after the project is complete. Replace any suspect lines ahead of time to prevent headaches later.

Also read: How to Install a Bathroom Sink Drain
Pick the Right Faucet
Select a new faucet that fits your sink’s existing mounting holes. Most bathroom sinks have standardized 4-inch spacing between holes.
However, spacing can vary on some vintage or designer sinks, so measure yours carefully to be sure.
Many faucets come with optional deck plates to cover extra holes if needed. But getting hole alignment right from the start prevents major hassles down the road. Also, consider a finish and style that fits your décor.
Brushed nickel and polished chrome remain popular choices that pair well with most color schemes.
Gather Necessary Tools
Basics like adjustable pliers, screwdrivers, flashlights, and buckets are essential. To make the installation smoother, gather specialty tools like basin wrenches,
Teflon tape, emery paper, extra towels, goggles, and additional supplies depending on your specific faucet model.
Nothing derails DIY projects faster than being forced to take different trips to the hardware store in the middle of the process.
Turn Off the Water Supply
Locating the shut-off valves, stopping water flow to the sink, and turning them off firmly before starting is a crucial first step.
Starting any faucet removal or plumbing disconnection with water still flowing freely is asking for trouble in the form of unexpected floods, damaged cabinetry, and irritation.
Also read: How to Properly Dry a Towel After Shower
Step-by-Step Faucet Installation Process
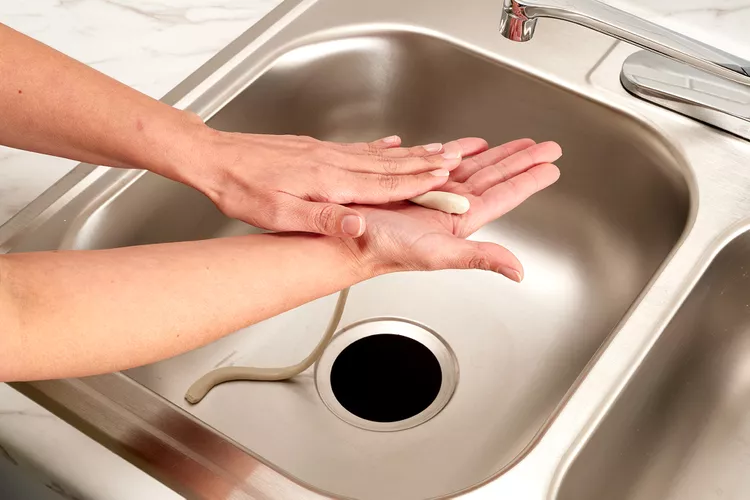
Apply the Plumber’s Putty Around the New Faucet Holes
With the sink surface now smooth and prepared, take a small section of plumber’s putty in hand and roll vigorously between palms into long, flat “snakes” about 1/4 inch thick.
Take each snake strip and firmly press into channel grooves around the supply line holes and main faucet hole atop the sink.
Work the pliable putty to seal off any gaps or indentations on the deck. This critical plumber’s putty step seals off spaces to prevent water from seeping below, leading to stains and damage.
Also read: Saniflo Toilet and Sink: The Perfect Duo
Insert Supply Tubes Through the Sink Bottom.
With putty in place, take the new faucet assembly and feed attached flexible water supply tubes down through the sinkholes you just sealed.
Make sure at least 1/2 inch of the supply tube extends from the bottom of the sink deck to allow connecting fittings to be secured later from below.
With holes aligned and tubes passing through putty beds, set the remainder of the faucet base in place atop the sink.
Position, Align, and Secure Faucet
At the sink top level, ensure the new faucet base plate settles completely flat and flushes against the deck surface. Visually check alignment to confirm the faucet body is centered and oriented correctly over the sink basin.
Now, slide the reinforcement plate (if provided) up into place, followed by mounting nuts threaded onto the base ends below the sink. The hand tightens initially.
If helpful, have someone above adjust the swiveling faucet heads slightly to achieve the final ideal positioned alignment while you get mounting nuts snug below.
Use pliers or a basin wrench to complete the final full tightening of nuts to proper torque.
Also read: Mop Sink Faucet Height for Optimal Performance and Safety

Connect Water Supply Lines
The undersink supply line connections come next. From below the sink, reach up to locate the ends of flexible supply tubes emerging down through holes. Make sure tube ends are cut evenly and deburred.
Ensure at least 1/2-inch of exposed thread shows for compression fittings to grab.
Slide compression nuts over tube ends, followed by included compression sleeves and washers according to your new faucet model instructions.
Hand thread compression nuts onto fittings as far as possible before finally tightening fully with pliers or a wrench. Getting nut threads well aligned avoids strip damage.
Repeat the tubing assembly sequence carefully with both hot and cold water lines.
Also read: Mushroom Growing in Sink Drains: How to Fix the Problem
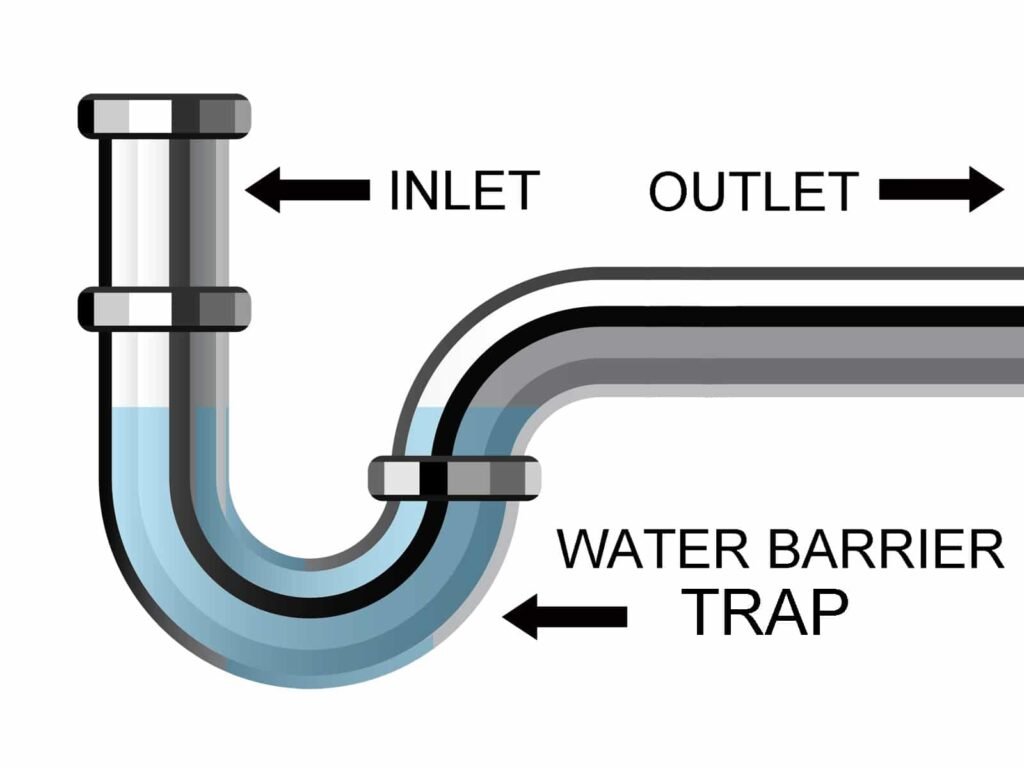
Reinstall P-trap
The sink drain P-trap was detached earlier and is now reconnected. Slide the curved section back snugly into place under the sink drain stub-out tube, followed by washers and slip nuts threaded loosely by hand at both ends initially.
After visually confirming the correct alignment, finish by tightening compression slip nuts at the tailpiece and wall tube connections with pliers or wrenches, not cracking plastic nuts.
When testing, be sure to position the extended long tailpiece end of the P-trap directly into the pre-positioned bucket to observe clearly if any leaks occur at joints.
Also read: Can A P-Trap Go Both Ways
Perform Water Test
Go slowly and incrementally when restoring water flow to perform the critical water test phase. First, turn previously shut-off hot and cold supply valves to allow flow into new faucet lines.
Open both just to a mild trickle initially while closely inspecting compression fittings at the supply line nut connections below. Watch below carefully while testing to spot even the smallest water drips indicating leakage.
Tighten any suspect compression nuts a bit more if even slight seepage is spotted, taking care not to over-tighten.

Finally, with no supply line leaks verified, focus on sink drain path testing. Temporarily plug the sink drain hole before closing the valve, allowing at least several inches of water to fill the basin fully.
Once full, pull the sink plug and check below for any drips while water rushes into the P-trap area. Tighten up any slip joint nuts further if even slight leakage appears below. After the second fill test, top up the sink basin and confirm drain connections remain drip-free.
Check Faucet Function
With project reassembly now complete, water valves can finally be left fully open. Turn the hot and cold handles on the shiny new faucet to flush any debris inside supply lines and flex tubes.
Ensure flow from each handle supplies expected temperatures at anticipated pressures matching your home’s plumbing norms. Carefully inspect new faucet end nozzles to ensure flow output form and pressure suits your preferences, with no unexpected sputtering.
Verify that mineral deposits do not clog integrated aerator screens after installation.
Finally, check the smooth operation of the pop-up drain plug mechanism by verifying that the sink basin seals fully without leaks when the lift rod is pulled upward to engage the stopper seal.
Also read: Can I Use Muriatic Acid to Unclog a Drain
Clean Up The Area Below The Sink
Mop up any drips or spills collected below the sink on your protective tarps or towels, and wipe down cabinet surfaces. Prepare to replace any items stored under the bathroom sink once the project cleanup is fully finished.
As a final professional touch, neatly secure dangling water supply tubes and P-trap sections with slip joint hangers attached to floor or wall studs.

Despite repeated contact during storage item cleaning, this prevents unattractive sagging and swaying of plumbing parts in the long term.
Double-check your work area above and below the sink before considering this replacement project complete.
Carefully disposing of debris, cleaning the area, and photographing the finished product will make you proud of upgrading your bathroom space with beautiful, functioning new fixtures.
Also read: Homemade Bathroom Cleaner Using Vinegar, Dawn, Baking Soda
Conclusion
While swapping out an old, inefficient bathroom faucet may seem daunting, following good preparation and installation steps makes it very doable.
Working methodically to remove old hardware completely while carefully inserting seals and precisely aligning new parts enables a successful, fuss-free installation.
Taking time to confirm water-tight compression fittings and leak-free slip joints prevents major issues. Asking for a helper to confirm visual alignment also ensures your new fixture looks and works perfectly for years of reliable service.
Feel free not to call on a professional if certain tricky aspects of your bathroom sink plumbing have you puzzled or unsure at any point.
Also read: Why Does My Bathroom Sink Smell Like Sewer
Why should I consider replacing my bathroom faucet?
A leaky, worn-out faucet not only detracts from your bathroom’s aesthetics but can also lead to increased water bills. Upgrading to a new, water-saving faucet refreshes the sink area and contributes to long-term savings.
Is replacing a faucet a difficult DIY project?
Contrary to common belief, replacing a faucet is a straightforward DIY project for most homeowners. By following essential preparation and installation steps, you can easily swap out your old faucet with a more functional and attractive model.
What should I check before starting the faucet replacement process?
Before starting, check the condition of the flexible supply lines and ensure compression fittings are tight. It’s crucial to pick a new faucet that fits your sink’s mounting holes, and gathering necessary tools beforehand, including specialty items like basin wrenches, ensures a smoother installation.