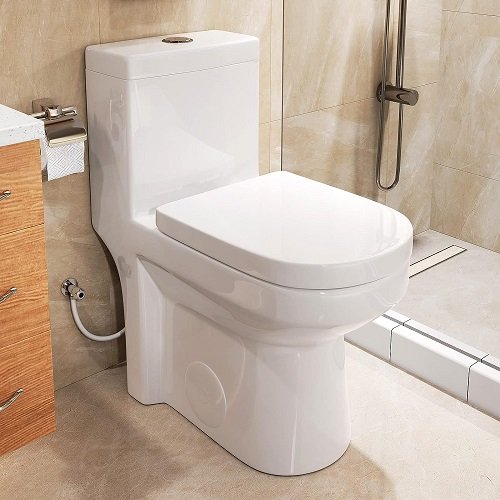
When installing a new toilet or replacing an existing one, measuring toilet rough-in dimensions accurately is crucial for proper positioning and performance.
The rough-in refers to the supply line and drain pipe locations to which the toilet will connect.
Accurate measurements help ensure that the bathroom aligns with the plumbing infrastructure behind the wall and sits at the right distance from the wall.
Here is a comprehensive guide on how to accurately measure toilet rough-in dimensions.
Understanding Toilet Rough-Ins
The toilet rough-in is the horizontal distance between the finished wall behind the toilet and the centerline of the toilet drain pipe (waste outlet) on the floor.
This rough-in measurement determines how far the toilet gets positioned from the back wall. Standard toilet rough-in lengths are 10”, 12”, and 14” but can be longer in older homes.
The bolts that secure the toilet to the flange mark the drain pipe center. This spot must align precisely with the toilet base drain hole during installation.
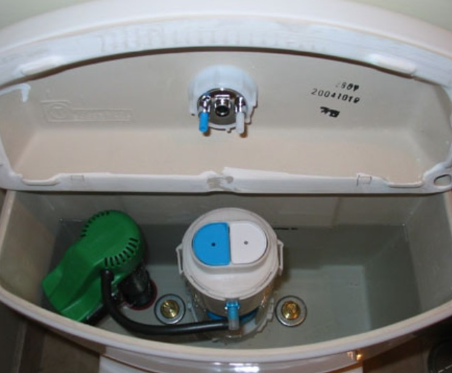
The other rough-in measurements to note are the valve and water supply line that connect to the bottom of the toilet tank.
These must be compatible with the new toilet location and height.
Also read: Is Flushing While Sitting on the Toilet Safe?
Why Measuring Toilet Rough-In Dimensions Accurately Matters
An accurate toilet rough-in measurement allows for:
Proper Toilet Positioning
The correct rough-in means your toilet base sits flat on the floor without rocking or wobbling. This prevents leaks below the toilet. It also ensures stability and prevents the risk of the toilet pulling away from the wall over time.
Adequate Clearances
Having the right rough-in provides the intended clearance between the toilet tank/bowl and the wall. This enables comfortable usage and facilitates easier cleaning with a brush.
Optimal Drainage Slope
Precision rough-in measurements ensure the toilet waste outlet is centered with and connects cleanly to the drain pipe slope in the floor. This facilitates efficient drainage without blockages or leaks.
Better Aesthetics
An accurate rough-in makes sure the gap between the wall and toilet suits the space. The toilet will look fairly close and far from the wall.
Also read: How to Get Rid of Tiny Air Bubbles in Toilet Bowl
How To Measure Toilet Rough-Ins Accurately
Follow these steps to measure your existing toilet rough-in precisely:
Step 1: Turn Off Water Supply
Switch off the water supply valve behind the toilet. Flush any water remaining in the tank and bowl completely.
Step 2: Remove Tank and Bowl Components
Unscrew the tank bolts evenly on both sides to detach them from the bowl. Carefully remove the tank and set it aside. Also, take out any loose bowl components like the lid and seat.
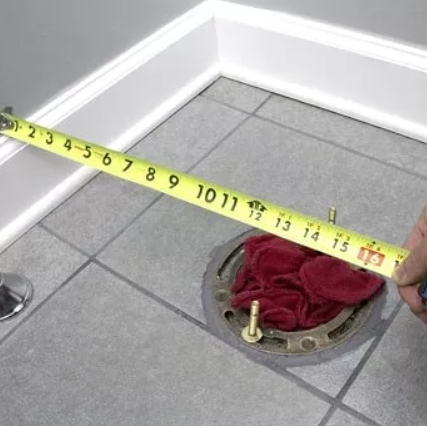
Step 3: Locate and Measure the Drain Pipe
Use a tape measure placed horizontally to measure from the base of the wall to the center of the drain pipe attached to the flange on the floor. The outer bolts inserted into the flange denote the drain pipe center. Standard rough-in measurements are 10”, 12”, and 14” but can vary beyond that in older homes. Carefully note this length.
Also read: Troubleshooting American Standard Touchless Toilet Problems

Step 4: Document Supply Valve Location
Also, note down the horizontal and vertical location measurements of the water supply valve and pipes coming out from the wall. The new toilet setup must accommodate these supply line positions.
Step 5: Check Floor Levelness
Examine if the floor around the flange is level. If there are any uneven tiles or slopes, address these before installing the new toilet.
Step 6: Reinstall the Tank and Components
Place the tank back securely onto the bowl bolts and tighten both bolts evenly. Reconnect the supply line and open the water valve to check for leaks. Reinstall all other detached bowl components like lids and seats.
Also read: How Long Should a Roll of Toilet Paper Last?
Measuring Rough-Ins Without Removing Toilet
If completely removing the toilet is not an option, here are two alternative methods:
Use an Angled Measurement Mirror
Carefully slide an angled mirror alongside the bowl to visually spot the drain pipe and flange location on the floor behind the bowl. Estimate its center and measure from there to the wall.
Or
Use a Closet Flange Test Cap:
- Remove the old wax ring and temporarily install an expandable test cap that fits into the drain hole.
- Expand it incrementally until it fits snugly.
- , Compress it and carefully pull it up through the drain hole to measure its length from the wall.
- Subtract 2 inches from this measurement to account for the added test cap length.
Also read: Who Makes Woodbridge Toilets, and Where are They Made?
Choosing Correct Toilet by Rough-In Measurement
Now that you have finished measuring toilet rough-in dimensions accurately, choose a new toilet with the corresponding rough-in length.

• 10” Rough-In Toilets: Great for small bathrooms as they maximize space. Ensure 10” clearance from wall to supply valve.
• 12” Rough-In Toilets: The most commonly used standard size. Offers a good balance of space savings and accessibility.
• 14” Rough-In Toilets: Allow more room between the user and the wall. Useful for wider areas or accessibility needs.
• Custom Rough-Ins: Special order non-standard bowl sizes if the rough-in is longer than 14”.
Also factor in bowl shape, height, flush performance, tank lever position, and WaterSense certification when selecting the toilet.
Also read: Why Is My Toto Toilet Making Noise After Flushing
Conclusion
Carefully measuring toilet rough-in dimensions is key to installing a well-positioned, high-functioning toilet.
Following the accurate measurement process using a tape measure or alternative methods ensures you get the right specifications. This allows you to choose the optimal new toilet for your specific bathroom space and plumbing infrastructure.
Paying attention to precision rough-in measurements from the start leads to a smooth toilet replacement process.
Also read: The Surprising Benefits of Placing a Red Cup Under Your Toilet Seat
How do I choose the right toilet based on rough-in measurements?
Select a toilet with a rough-in length that matches your measured distance. Consider factors such as bowl shape, height, flush performance, tank lever position, and WaterSense certification for a well-rounded choice.
What toilet rough-in lengths are standard?
Standard toilet rough-in lengths are 10”, 12”, and 14”. Choose the appropriate length based on your bathroom space, ensuring compatibility with the plumbing infrastructure.
How do I measure toilet rough-ins without removing the toilet?
Use an angled measurement mirror to visually spot the drain pipe and flange location behind the toilet, or employ a closet flange test cap to estimate the rough-in length without uninstalling the toilet.
Why is accurate toilet rough-in measurement crucial?
Accurate measurements ensure proper toilet positioning, preventing leaks, providing adequate clearances, maintaining optimal drainage slope, and enhancing overall aesthetics in your bathroom.